Vite assets are still localhost on production server

If you are using vite.js (for example when using Laravel assets bundler) then running the npm run build command triggers the build process for your project. When you run this command, Vite.js will perform several tasks to prepare your application for production deployment.

If you use Git and upload/deploy your files to production server and you css is not working then check the source code.  If you see something like this on your production server :

<script type="module" src="http://127.0.0.1:4523/@vite/client"></script>
<script type="module" src="http://127.0.0.1:4523/resources/js/app.js"></script></code>

then check if the “hot” file was accidentally uploaded to your server (github) to your Laravel public folder. Delete it and it should work. This file is used when running the dev server but will break production.

To exclude this file being uploaded to github you add it to .gitignore file:

/public/hot

Fatal error: Unparenthesized `a ? b : c ? d : e` is not supported in DatabaseInterface.php on line 615

You will get this error when you upgrade your PHP 7 to PHP 8 (or even 7.3 to 7.4 or something like that) but keep your old phpmyadmin version. This error can be in any code but in our case it is in phpMyAdmin\libraries\classes\DatabaseInterface.php file so we need to fix it for phpMyAdmin. We will not fix the code itself because in this case it is not needed.

The solution here is for Laragon. It is a little longer, but easy, Laragon oriented solution so you can better understand how it works. Scroll down to the end to do this manually (faster).

Laragon solution

It is possible that your Laragon came with older phpMyAdmin version. So we will tell Laragon to download the latest one.

Open your {INSTALLATION_PATH}\laragon\etc\apps\phpMyAdmin folder. Just in case, backup this phpMyAdmin folder first. Then delete all files in it so the folder is empty.

Right click the laragon tray icon, then Tools then Quick add and then Configuration…

laragon options configuration quick app

this will open packages. conf file in your text editor. Find this line :

# phpMyAdmin
phpmyadmin= *******

of course you will see a link to phpmyadmin download page. It will pobably be link to a specific version.

Change it to this (latest version of phpmyadmin) and save the file.

# phpMyAdmin
phpmyadmin=https://www.phpmyadmin.net/downloads/phpMyAdmin-latest-all-languages.zip

Note: if the second line starts with # you need to delete the # character.

Right click the laragon tray icon again, then Tools then Quick add and then phpmyadmin… and Laragon with automatixally downlaod the latest phpMyAdmin and install it.

laragon phpmyadmin

Restart Laragon, open yourproject.test/phpmyadmin/ in your browser (your project will be called different than yourproject.test) and phpmyadmin should work.

Manual solution

1. backup and then delete all files in {INSTALLATION_PATH}\laragon\etc\apps\phpMyAdmin folder
2. Download the latest version of phpMyAdmin from https://www.phpmyadmin.net/downloads/
3. Extract the content of downloaded ZIP file into a empty phpMyAdmin folder
4. Restart laragon and phpMyAdmin should work.

Download latest Laragon & Install Laravel 9

I like to use Laragon sometimes for my Laravel development. I had Laragon 5 installed and wanted to create new Laravel 9 project. When I selected Quick App-> Laravel it installed Laravel 8! I looked at Laragon website but the latest one there is Laragon 5 with PHP 7. Laravel 9 requires PHP 8.

Good news is that Laragon has already updated to Laragon 6 with PHP 8 but for some reason there is no downlaod link on their downlaod page (at the time of writing this post).

So what you need to do is go to Laragon github page and download latest laragon-wamp.exe from there. Then you do a backup of your current laragon folder on your PC and then just install the latest Laragon – it will keep all your files and settings, just upgrade to latest Laragon with PHP 8.

After you are done right click the Laragon icon, quick app and Laravel and it will install Laravel 9 (and probably next versions as long as they require PHP 8)

Laravel – Remove Public from URL

Why is my Laravel URL mysite.com/public by default and how do I remove “public” from URL?

Probably the first question most people ask when they install their new Laravel site.

Here are 2 ways, luckily it is easy to do.

1. The most standard one is to just edit .htaccess file and add these lines:

<IfModule mod_rewrite.c>
   RewriteEngine On 
   RewriteRule ^(.*)$ public/$1 [L]
</IfModule>

Note: For this to work you must have mod_rewrite enabled on your Apache server because rewrite module is required to apply these settings.

2. This option is either easier or more complicated, depending on if you can edit ‘Document root’ on your hosting server. So, if you have access to Cpanel of your hosting AND they allow you to change ‘Document root’ then change it from let say “/public_html” to “/public_html/public”. That should do the trick.

If you can’t edit ‘Document root’ by yourself (security measure etc) then the best is to ask your host support to change it to “/public_html/public” (assuming your root folder for website is /public_html . If it is /www then let them change it to /www/public).

Using Laragon for Laravel projects

I am in the process of migrating one of my sites from Codeigniter (anyone remember it? It promised so much but then fell behind, especially when Laravel came out years ago) to Laravel. It’s been a while since I used Laravel but I always love developing with it.

I always use XAMPP for local development but luckily I googled for alternatives and found Laragon. What an awesome find. At first I thought it was just for Laravel, due to name Laragon but you can use it for everything.

So here is how easy it was to install latest Laravel and start local development.

  1.  Go to Laragon website and download it, full or lite. Install (also select development folder) and start the services. Now you have a running web server!I changed few preferences (I don’t want it to start with Windows but I want it to start minimized and start ALL services at once) but you can do whatever is best for you.
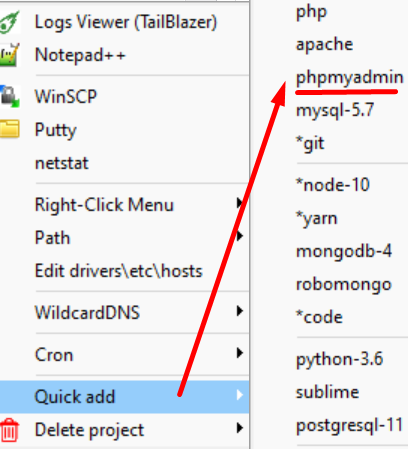
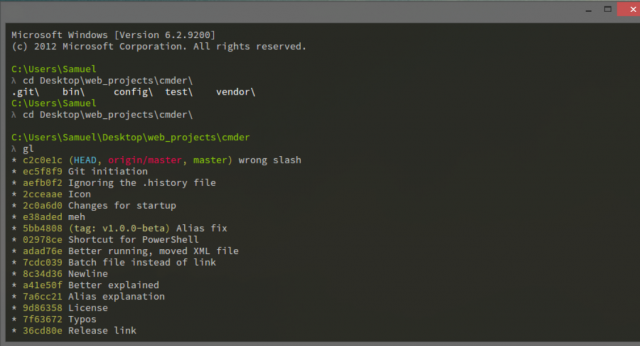
Another great thing: It comes with my favorite Console Emulator CMDER (not my screenshot):
  2. Let’s install Laravel. Right click blue (or green) Laragon tray Icon -> Quick App -> Laravel, name the project (folder)  and Laragon will begin to install Laravel via console. If you get asked for admin permission to open console (for hosts if I remember correctly) say yes.   When it finishes you should be able to open the web at ProjectName.test . I have to say that the first time I installed Laravel the scripts in console did not finish so it didnt work. I deleted the project folder, restarted the step  2. again and then it worked – Laravel was installed!
    laragon install laravel
  3.  I noticed that phpmyadmin was not installed. It is super easy again to install it :  Right click blue (or green) Laragon Icon -> Tools -> Quick Add -> *phpmyadmin . Wait few moment and you can access it at localhost/phpmyadmin/

And that is all. I installed local web server, Laravel and phpmyadmin with few clicks.

Curl Error : SSL certificate problem: unable to get local issuer certificate Laravel Wamp

Got this error when trying to use a Laravel API package that used Curl:

Curl Error : SSL certificate problem: unable to get local issuer certificate

I am using WAMP (local development) so the solution that worked was this (Let’s assume your PHP version is 7.1.9):

1. Download/save this file: http://curl.haxx.se/ca/cacert.pem into (your wamp path might differ) the C:\wamp64\bin\php\php7.1.9 folder.

2. Now you have to edit php.ini file but in my case it was not the one that is in the above folder (I tried that one first but still got the same error) but it was the one in this (your wamp and apache folder might differ) folder:  C:\wamp64\bin\apache\apache2.4.27\bin . The easiest way to open this file is to click on the green W (Wamp) icon in the tray, then PHP and then php.ini and Windows should open this file for you.

3. Find this line
;curl.cainfo
and change it to :
curl.cainfo = "C:\wamp614\bin\php\php7.1.9\cacert.pem"
Dont forget to remove the ; at the start of the line and of course use your wamp path.

4. Restart (or exit and start) the WAMP server and the error should be gone!


Laravel Composer using the wrong PHP version

I installed WAMP for offline development, then Composer and then Laravel. Everything was OK until I used Composer to download some Laravel package and I got this kind of error:

This package requires php >=7.0.0 but your PHP version (5.6.25) does not satisfy that requirement

Number don’t matter but I needed newer PHP. OK, I changed PHP version on WAMP, restarted it..and Laravel composer gave me the same error!

Long story short, after an hour of googling and trying all the suggested solutions like editing composer.json and this and that, nothing worked!

The solution is simple: reinstall Composer! D’oh!

When you run setup you can select the PHP version you want Composer to use (of course you have to have this PHP version installed on your PC or server) and the Composer will use it from then on:


laravel composer php version

After doing this this I was able to install the package. To be honest, I was quite upset that so many people offered some complicated solutions (that didn’t even work for me) on various forums and wasted my time when the solution was so simple.


How to check Laravel version?

Every now and then you would like to check what version of Laravel do you have installed. How to determine that? Here are a couple of ways. I tested this for Laravel 4.

1. The easiest way is to simply run artisan command php artisan --version from your CLI and it will return your Laravel version:

check laravel version

2. You can also browse to and open file vendor\laravel\framework\src\Illuminate\Foundation\Application.php. You will see the version of your Laravel instalation near the top of the class, defined as a constant:

/**
	 * The Laravel framework version.
	 *
	 * @var string
	 */
	const VERSION = '4.0.10';

3. You can also place a little code in your routes.php file at the end and then access it like yourdomain.com/laravel-version . This of course assumes that there is nothing in your routes.php file that would not allow the access of /laravel-version route.

Route::get('laravel-version', function()
{
$laravel = app();
return "Your Laravel version is ".$laravel::VERSION;
});

Please keep in mind that it is best not to keep this code on your production server. It’s not that it is harmful but there is simply no need for this because the first two methods that I showed you are simpler. If you still want to keep it then maybe you can comment it out.

There are other ways, especially with code but why complicate things when these 3 are the easiest? 🙂

If you know some simpler ways then please let me know in the comments.

Laravel 4 with Twitter Bootstrap

One of the first thing many, including me, want to do after installing Laravel 4 is to add Twitter Bootstrap. If you go searching for this on Google you will get all kids of results that may confuse beginner. “Use Bower”, “Install it as a external package then use Basset” and several more. I think some are a little too complicated for a beginner and it doesn’t need to be. I know adding a line to composer.json is easy but this will usually (depending on whcih package you chose) download gazillion of files to your vendor folder.

Here is what to do for a simple website – you don’t need to treat it as a external package that needs to be added via composer, bower or be used with help of Basset etc. Sure, it’s easier to update it via composer but it is not that difficult to update it manually too – if you indeed need an update.

So here are few easy ways:

Use Bootstrap CDN links

Simply include 3 links, which will fetch your twitter bootstrap files from MaxCDN site. This is the easiest and fastest way. Let’s assume that you have a master blade template called default.blade.php. Place this code inside your HTML head section (anywhere):

<head>

<!-- Latest compiled and minified CSS -->
<link rel="stylesheet" href="//netdna.bootstrapcdn.com/bootstrap/3.0.3/css/bootstrap.min.css">

<!-- Optional theme -->
<link rel="stylesheet" href="//netdna.bootstrapcdn.com/bootstrap/3.0.3/css/bootstrap-theme.min.css">

<!-- Latest compiled and minified JavaScript -->
<script src="//netdna.bootstrapcdn.com/bootstrap/3.0.3/js/bootstrap.min.js"></script>

</head>

That’s it, you should now be able to use Twitter Bootstrap goodness.

Download Bootstrap and put it in your public folder

I like to host my own files and not depend on third party so I usually do this. Here we don’t treat Twitter Bootstrap as a Laravel package.We will bypass Composer so we manually put Twitter Bootstrap files into our public assets folder.

Go to getbootstrap.com, download Twitter Bootstrap ZIP file and extract the content of ZIP file (pull entire dist folder) to your /public/ folder. I usually rename dist folder to tb.

You will then end up with css,fonts and js folders inside /public/tb/ folder.

Now we follow the same procedure like before except that we will link to local files we just downloaded. I will use Laravel’s HTML helper to create links. {{ and }} is a Laravel Blade syntax.

<head>

{{ HTML::style('tb/css/bootstrap.css') }}
{{ HTML::style('tb/css/bootstrap-theme.min.css') }}
{{ HTML::script('tb/js/bootstrap.min.js') }}

</head>

As you can guess the first two lines will create CSS style links and the third one will create script link. If you view the source of generated page you will see that Laravel’s HTML helper created something like this (of course http://yoursite.dev will be replaced by your site) :

<head>

<link media="all" type="text/css" rel="stylesheet" href="http://yoursite.dev/tb/css/bootstrap.css">
<link media="all" type="text/css" rel="stylesheet" href="http://yoursite.dev/tb/css/bootstrap-theme.min.css">
<script src="http://yoursite.dev/tb/js/bootstrap.min.js"></script>

</head>

There are other ways (Bower, Composer, Basset…), which I might show in another post (or maybe I’ll update this post later) but these two are the easiest, especially for those just starting with Laravel 4.

Enjoy your Twitter Bootstrap powered Laravel 4 website 🙂

Use Composer to install packages not on Packagist

Packagist and Composer are a great combination for installing the packages that we need for our projects (in my case for Laravel 4 project). For example you want to use Sentry 2 so you simply add "cartalyst/sentry": "2.0.*" as required package in your composer.json file. But what if we need a package that is not on Packagist? There are several ways but I will show you two solutions (and maybe add others later).

Installing package that has no composer.json file

In my case I wanted to add Jquery.Gantt package to my Laravel 4 project. This package is not listed on Packagist and doesn’t have its own composer.json file so you can’t just add "Jquery.Gantt": "1.0.*" under "require": in your composer.json file.

What we need to do is add some code to our composer.json file to tell Composer something about the new package,where to find it etc.

Just so you can imagine how this looks when it is all done, here is my entire composer.json file for one of my projects.Keep in mind that you only have to add what is highlighted in grey (lines 2-19 and line 26) to your composer.json file and not everything. The rest of the code is for my project and is included only so you can see where to put your code. Don’t forget to backup the original composer.json before doing this 🙂

  {
    "repositories": [
        {
            "type": "package",
            "package": {
                "name": "taitems/jQuery.Gantt",
                "version": "1.0",
                "dist": {
                    "url": "https://github.com/taitems/jQuery.Gantt/archive/master.zip",
                    "type": "zip"
                },
                "source": {
                    "url": "https://github.com/taitems/jQuery.Gantt.git",
                    "type": "git",
                    "reference": "dev-master"
                }
            }
        }
    ],
	"require": {
		"laravel/framework": "4.0.*",
		"cartalyst/sentry": "2.0.*",  
		"jasonlewis/expressive-date": "1.*",
		"opauth/opauth": "*",
		"opauth/facebook": "*",  
		"taitems/jQuery.Gantt": "1.0",  
		"way/generators": "dev-master"
	},
	"autoload": {
		"classmap": [
			"app/commands",
			"app/controllers",
			"app/models",
			"app/database/migrations",
			"app/database/seeds",
			"app/tests/TestCase.php"
		]
	},
	"scripts": {
		"post-update-cmd": "php artisan optimize"
	},
	"minimum-stability": "dev"
}

Lines 2-19: You have to change few things of course, depending on what package you are installing. Copy the Name from GitHub page (I took mine from https://github.com/taitems/jQuery.Gantt)). You can find both ZIP and .git URLs on GitHub page of that package. Version should be the package version number you want to use – if you are not sure then try * sign.

Line 26: You add this just like you would normaly add every dependency/package that is listed on Packagist.

That’s it. Just run php composer.phar update and your new package will be installed into /vendor/ folder, just like every other package/dependency.

Installing package that is not on Packagist but has composer.json file

I have not tried this yet but in case the package has composer.json file you can just use this code:

"repositories": [
    {
        "type": "vcs",
        "url": "https://github.com/taitems/jQuery.Gantt"
    }
]

It’s the same as in first example – you start from line 2, after the opening {. Do we are using VCS repository instead of the package repository. Composer will use the GitHub API to fetch the branch names and check if the version dev-soft-deleteable-products-disabled exists. If it does, it will clone the repository and check out said branch.

Again, run php composer.phar update and your new package should be installed into /vendor/ folder, just like every other package/dependency.

Note: VCS example will not work on the jQuery.Gantt package because this package has no composer.json file so you have to use the first method. VCS example is here only to demonstrate what to do when the package has composer.json file included.