How to remove empty lines in Visual Studio Code

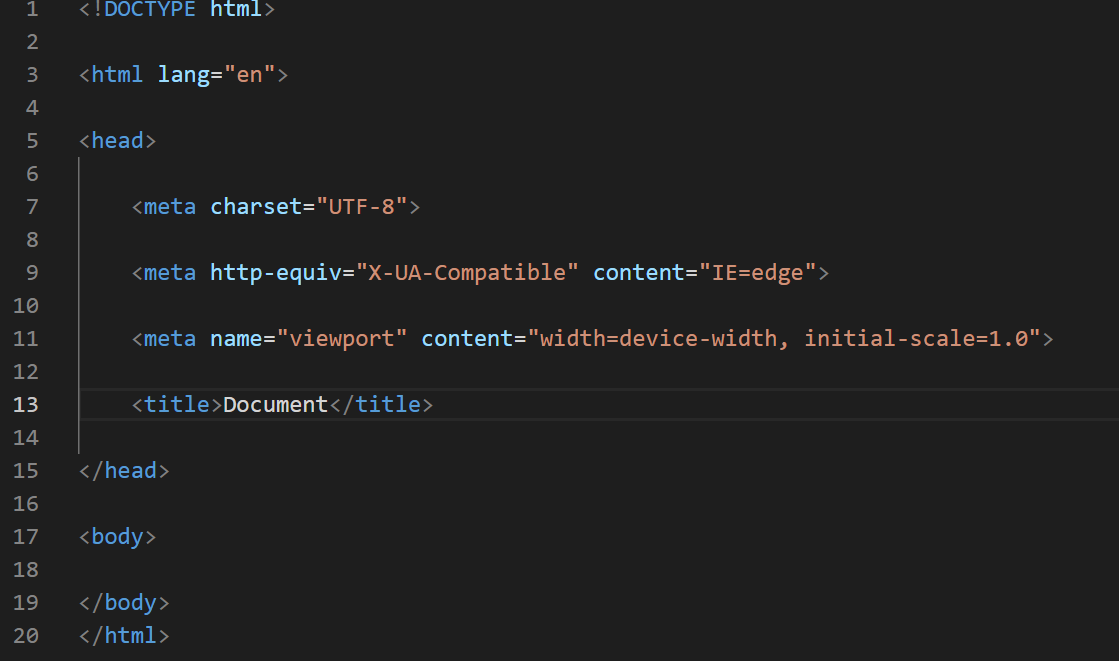
For some reason every now and then I get every other line empty when opening a file with code in Visual Studio Code. Annoying. It looks like this (made up example):

How to remove empty lines in Visual Studio Code

Here is how to get rid of these empty lines:

  1. From Edit Menu, select Replace or press command + Option + F on Mac or Ctrl + H on Windows
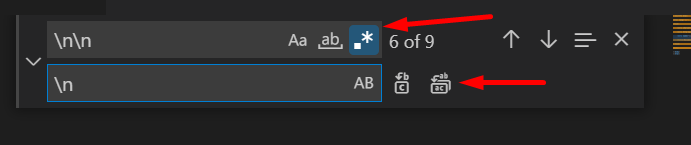
  2. In the find box type \n\n
  3. In the replace box type \n
  4. Select the ‘Use Regular Expression’ button (top red arrow)
  5. Click on the ‘Replace All’ button (bottom red arrow)

Here is a photo of the search/replace box:
search replace empty lines  code

If you are not sure then you can replace it one by one but that is not really necessary. If you see something is wrong then just press CTRL-Z on Windows and VS Code will revert back to code before replacement.

and this is how it should look like after you remove all empty lines:
vs code empty lines removed

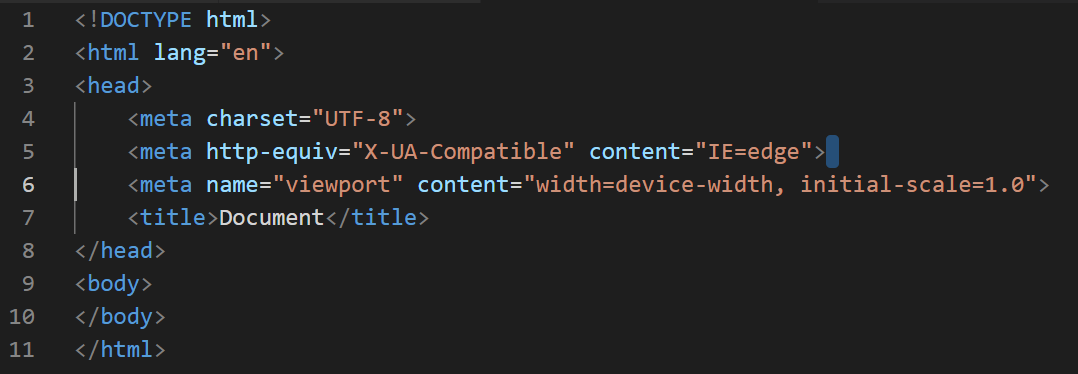
Much nicer and as it should.

Download latest Laragon & Install Laravel 9

I like to use Laragon sometimes for my Laravel development. I had Laragon 5 installed and wanted to create new Laravel 9 project. When I selected Quick App-> Laravel it installed Laravel 8! I looked at Laragon website but the latest one there is Laragon 5 with PHP 7. Laravel 9 requires PHP 8.

Good news is that Laragon has already updated to Laragon 6 with PHP 8 but for some reason there is no downlaod link on their downlaod page (at the time of writing this post).

So what you need to do is go to Laragon github page and download latest laragon-wamp.exe from there. Then you do a backup of your current laragon folder on your PC and then just install the latest Laragon – it will keep all your files and settings, just upgrade to latest Laragon with PHP 8.

After you are done right click the Laragon icon, quick app and Laravel and it will install Laravel 9 (and probably next versions as long as they require PHP 8)

Either “name” or “item.name” should be specified (in “itemListElement”) error

There are few different reasons to get this error but here is my case: It involved WordPress and Yoast SEO plugin. I suddenly received this error from google search console, it said:

“New Breadcrumbs structured data issues detected”

Top critical issues*
Either “name” or “item.name” should be specified (in “itemListElement”)

*Critical issues prevent your page or feature from appearing in Search results.

Now that sounds serious, right? Not have your site or page appear in Search results? Ouch!

One of the solutions for this is to go to WordPress settings -> Reading and then select a page for your homepage. This is where Yoast SEO will read the missing data.

But in my case I could not do this because there is no homepage, I use “Your latest posts” as a default “homepage”. So somehow this confused Yoaast SEO plugin (can also be other plugins). Luckily there was an easy fix within Yoast.

In WP admin select Yoast SEO -> Search Appearance then breadcrumbs tab and then find the Anchor text for the Homepage field. Fill it with anything you want, I used “Home”.

Save it and if needed wipe the site cache and the problem should be solved.

Keep in mind that this error can appear on any page that has this name tag empty. This solution is just for HOMEPAGE problem, because that is what Google search console told me: root URL had this problem. If you have the problem with specific subpages or posts then this will probably not solve your problem.

Laravel – Remove Public from URL

Why is my Laravel URL mysite.com/public by default and how do I remove “public” from URL?

Probably the first question most people ask when they install their new Laravel site.

Here are 2 ways, luckily it is easy to do.

1. The most standard one is to just edit .htaccess file and add these lines:

<IfModule mod_rewrite.c>
   RewriteEngine On 
   RewriteRule ^(.*)$ public/$1 [L]
</IfModule>

Note: For this to work you must have mod_rewrite enabled on your Apache server because rewrite module is required to apply these settings.

2. This option is either easier or more complicated, depending on if you can edit ‘Document root’ on your hosting server. So, if you have access to Cpanel of your hosting AND they allow you to change ‘Document root’ then change it from let say “/public_html” to “/public_html/public”. That should do the trick.

If you can’t edit ‘Document root’ by yourself (security measure etc) then the best is to ask your host support to change it to “/public_html/public” (assuming your root folder for website is /public_html . If it is /www then let them change it to /www/public).